How to Fix Trim Dog Chewed? Quick Solutions
If your trim suffered from a doggy demolition, follow these quick steps. First, inspect the damage for holes, gouges, and stains. Next, gently scrape off splinters and sand the area smooth. Fill gouges with the right filler and apply primer before painting. Finish off with a protective varnish for a durable coating. By following these steps, you can restore your trim to its former glory in no time. You’ll find more detailed guidance below to help your trim look brand new again.
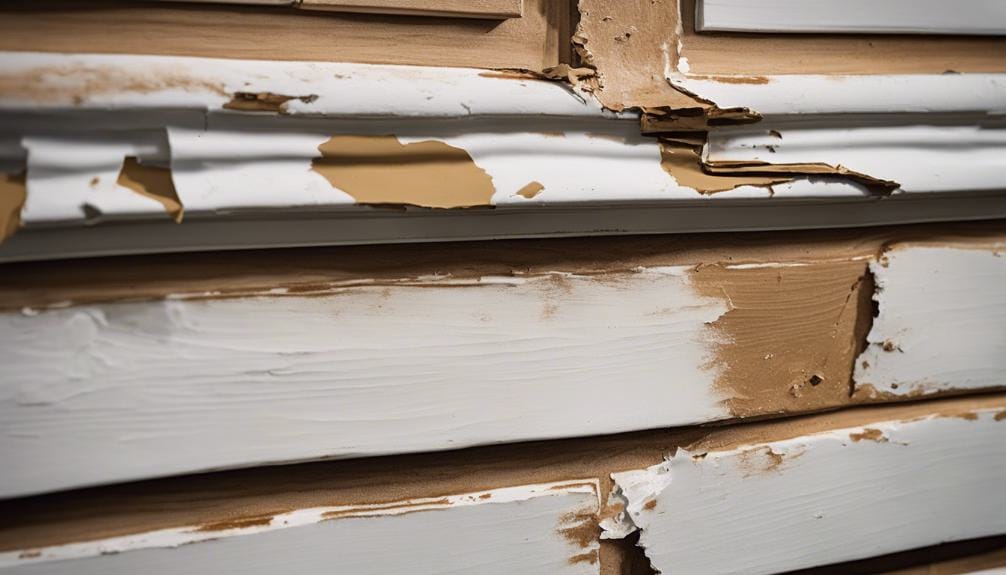
Assessing the Extent of Damage
To accurately assess the extent of damage caused by your dog’s chewing on the wood trim, carefully inspect the area for visible holes, gouges, and any signs of urine or droppings. The importance of the damage will determine the repair needed.
Look closely for torn wood fibers, as well as any urine stains that may indicate deeper issues. Evaluating the chewed trim thoroughly is essential to understand the full scope of the damage before proceeding with repairs.
Lightly Scraping and Removing Splinters
When tackling the task of fixing trim that your dog has chewed, remember to approach splinter removal with care. Lightly scrape the damaged area to prepare it for repair, avoiding the temptation to dig out splinters still attached to the wood.
Removing surface splinters during this process will help guarantee a smoother finish once sanding begins.
Splinter Removal Techniques
Gently scrape the damaged area with a pull scraper to effectively remove surface imperfections and splinters still embedded in the wood. Be cautious not to create more splinters, which could complicate the repair process. Sand the area by hand using 120-grit sandpaper to smooth out small gouges and nicks, preparing the trim for filling and painting. These splinter removal techniques are essential for a successful repair of dog-chewed trim.
| Splinter Removal Techniques |
|---|
| 1. Gently scrape damaged area with pull scraper |
| 2. Be cautious to avoid additional splinters |
| 3. Sand with 120-grit sandpaper by hand |
| 4. Prepare trim for filling and painting |
| 5. Ensure effective and successful repair |
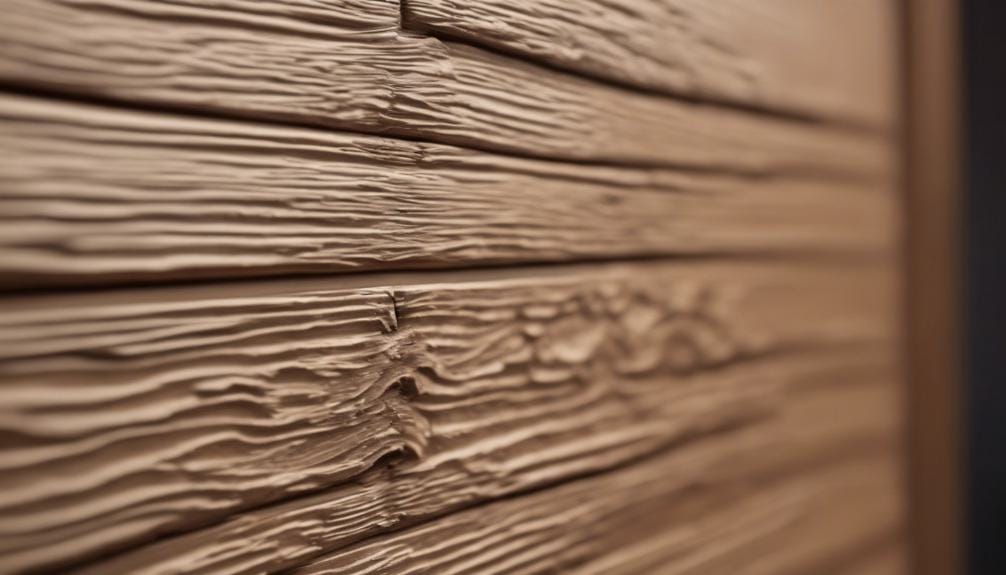
Scraping for Smooth Finish
For a smooth finish when fixing trim that has been chewed by a dog, lightly scrape the damaged area with a pull scraper to prepare it for repair. While scraping, be cautious not to dig out splinters still attached to the wood to prevent further harm. This process also aids in removing surface splinters, ensuring a smoother surface after sanding.
Following scraping, utilize a 120-grit sandpaper to hand-sand the damaged region, smoothing out minor gouges and nicks. Note that sanding might eliminate some of the finish, but it contributes to achieving a seamless repair.
Once the scraping and sanding are complete, consider using wood filler and a putty knife to fill in any remaining imperfections before refinishing the trim.
Sanding the Damaged Area
When sanding the damaged area of your trim, remember to smooth out rough edges and apply wood filler as needed to restore the surface.
Sanding with 120-grit sandpaper will help you achieve a smooth finish, especially for small gouges and nicks.
Smooth Out Rough Edges
Smooth out rough edges on the damaged trim by lightly scraping the area with a pull scraper before using 120-grit sandpaper for a seamless finish. Sanding the damaged door helps in removing imperfections, creating a smooth surface for repair. Here is a quick guide on how to sand the damaged trim effectively:
| Step | Description | Tips |
|---|---|---|
| Lightly Scrape | Use a pull scraper to remove any rough edges or protruding wood. | Be gentle to prevent causing more damage. |
| Sand with 120-Grit | Smooth out the surface by sanding with 120-grit sandpaper. | Work in the direction of the wood grain for optimal results. |
| Hand Sanding | Opt for hand sanding to ensure precision and control. | Monitor the progress frequently for a consistent finish. |
Apply Wood Filler
Prepare the damaged area by lightly scraping it with a pull scraper before hand-sanding with 120-grit sandpaper to apply wood filler for a seamless repair.
When dealing with gouges in door trim, opt for epoxy wood filler for stained or unpainted surfaces as it can be color-matched or use a clear filler for invisible fixes.
After filling the damaged area, guarantee a flawless finish by applying wood primer and paint for painted trim or stain followed by polyurethane varnish for unpainted trim.
This process guarantees that the repaired area blends seamlessly with the rest of the trim, restoring its original appearance. Sanding and filling with the appropriate wood filler will help you achieve professional-looking results on your chewed door trim.
Filling Gouges With Appropriate Filler
To seamlessly repair gouges in painted trim, utilize drywall joint compound as the appropriate filler. For gouges in a door frame, consider using a nail to create a small hole at the base of the gouge before applying the compound. This step helps the filler adhere better and provides a more stable repair.
Once you have prepared the area, carefully fill the gouges with the drywall joint compound using a putty knife. Smooth the filler over the damage, ensuring it’s level with the surrounding trim. Allow the compound to dry fully before sanding it down to achieve a uniform surface.
This method will help you restore the appearance of your trim efficiently and effectively.
Applying Primer and Paint/Stain
For best results, make sure the repaired trim is coated with a premium wood primer before applying paint or stain. Applying wood primer is essential as it creates a smooth base that enhances the adhesion and durability of the final coat. Choose a high-quality primer that suits the type of paint or stain you intend to use.
Properly applying the primer ensures a uniform finish and long-lasting protection for the wood trim. Allow sufficient drying time for the primer before applying the final coat of paint or stain. This step is necessary to achieve ideal results and ensure that the repaired trim looks seamless and well-protected.
Finishing With Protective Varnish or Clear Coat
After applying the necessary primer and paint/stain to the repaired trim, the next step involves finishing with a protective varnish or clear coat.
Adding a varnish or clear coat to the wood trim enhances its durability, creating a protective barrier against moisture, stains, and scratches. This extra layer safeguards the trim from daily wear and tear, ensuring it maintains its integrity over time.
Varnish not only provides protection but also adds a glossy or matte finish, improving the aesthetic appeal of the trim. By properly sealing the repaired trim with varnish or clear coat, you can prevent future damage and keep the wood looking fresh.
Frequently Asked Questions
How Do You Fix a Dog’s Chewed Trim?
To fix a dog’s chewed trim, sand the damaged areas, fill holes with appropriate materials, prime, and paint for a seamless finish. Quality materials are essential for durable repairs. Prompt action prevents further damage and maintains your home’s appearance.
How Do You Fix a Chewed Door Trim?
To fix chewed door trim, sand the damage, fill holes with joint compound or wood filler, prime, and paint. Choose quality materials for lasting repairs. Addressing it promptly prevents further damage and keeps your home looking good.
How Do You Fix Wood After a Dog Chews?
To fix wood after a dog chews, sand imperfections, fill holes with joint compound or epoxy wood filler, then prime and paint for painted trim or stain for unpainted trim. Quick action maintains your home’s appeal.
What Can I Put on My Baseboards to Keep Dogs From Chewing?
To keep dogs from chewing on your baseboards, try applying bitter apple spray or citrus-based deterrents. Use pet-safe sprays or vinegar. Offer chew toys and bones. Train with positive reinforcement. Supervise their behavior regularly.
Conclusion
To wrap up, repairing trim that has been chewed by a dog is a manageable task with the right tools and techniques. By evaluating the damage, scraping away splinters, sanding the area, filling gouges, and applying primer and paint/stain, you can restore your trim to its former glory.
Finish off with a protective varnish or clear coat to guarantee durability. With a little time and effort, your trim will look good as new!